LY Drawbot: Building a Pen Plotter and Making a First Plot
What a pen plotter is and what it is not, assembling a low-cost A4 kit, the chain from drawing to G-code to moving pen, and the small things that decide whether a first plot works.
What a pen plotter is
A printer puts dots on paper, line by line. A pen plotter holds an ordinary pen and moves it: down onto the paper to draw, up to move to the next line. It does not know pictures, only paths — lines and curves with a start and an end. That is why plotters read vector graphics such as SVG, and why the result has the feel of a drawing: real ink, a slightly uneven line, the pressure of the pen in the paper.
Plotters were common office machines from the 1960s to the 1990s for technical drawings and maps. Today they are back as a maker's and artist's tool, especially for generative art: drawings made by code.
What you can do with one
- Line art, patterns and geometric drawings.
- Generative art: a program computes the lines, the plotter draws them.
- Handwriting-like text, with single-line fonts (one stroke per letter instead of an outline).
- Different pens, colors and papers: a fineliner, a gel pen, a brush pen, white ink on black paper. Changing color means changing pens between two plots.
- Shading with lines: hatching, cross-hatching, spirals or dots in place of gray tones.
What you cannot do
- Print a photo as it is. A photo has to be turned into lines first (for example by tracing or hatching), and the result is an interpretation, not a copy.
- Fill areas. A filled shape becomes its outline; a filled look has to be built from many lines, which takes time and soaks paper.
- Print fast. A full page of lines can take tens of minutes; a dense drawing hours.
- Expect the accuracy of a printer or a professional plotter: a kit with belts and plastic parts has some play, and that shows in small details.
The LY Drawbot
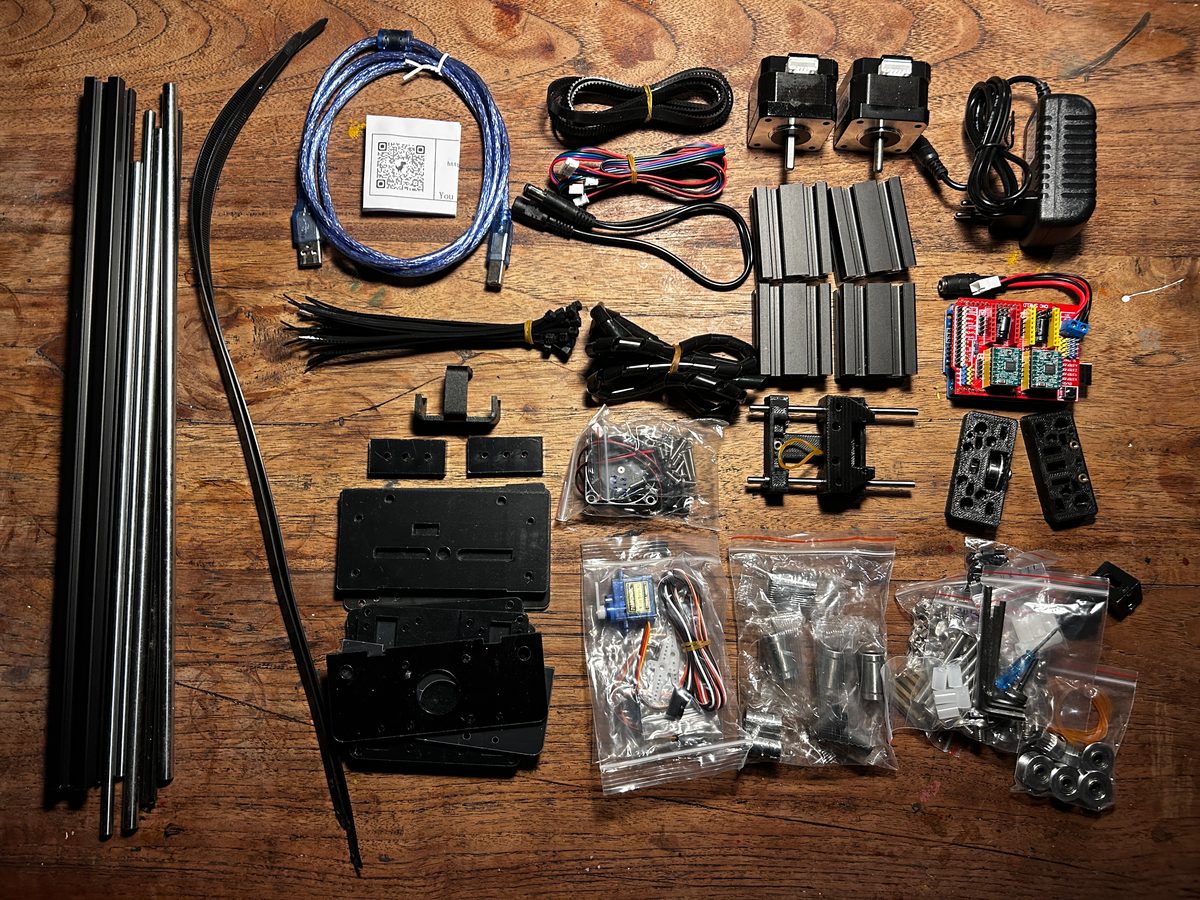
The LY Drawbot is an inexpensive XY plotter kit sold through Chinese web shops, in an A4 and a larger A3 version. I bought the A4 one. It is a small gantry: two stepper motors with belts move the pen holder in X and Y, and a hobby servo moves the pen up and down. The brain is an Arduino Uno clone with a CNC shield, running GRBL: open-source firmware that reads G-code over USB and turns it into steps for the motors.
A clone is an Arduino-compatible board from another maker. That is allowed: Arduino publishes its board designs as open hardware. It only becomes a counterfeit when it carries the Arduino name or logo. Clones usually use a cheap CH340 chip for the USB connection instead of the ATmega16U2 on the official Uno, which is why the kit comes with the CH340 driver.
G-code is the language of CNC machines, 3D printers and plotters: plain text lines, each one a command. A plotter needs only a handful of them:
G90               absolute coordinates
G21               millimeters
M5 S0             pen up
G1 F3000          speed for moving, in mm per minute
G1 X56.70 Y138.88 move to the start of a line
M3 S1000          pen down
G4 P0.2           wait 0.2 s for the servo
G1 F1500          slower speed for drawing
G1 X38.74 Y137.66 draw a straight line to here
M5 S0             pen up again
G1 X0 Y0          back to the zero point
The commands M3 and M5 originally switch a
spindle or a laser on and off; on this plotter the firmware uses
them to move the servo, so "spindle on" means "pen down".
Building it
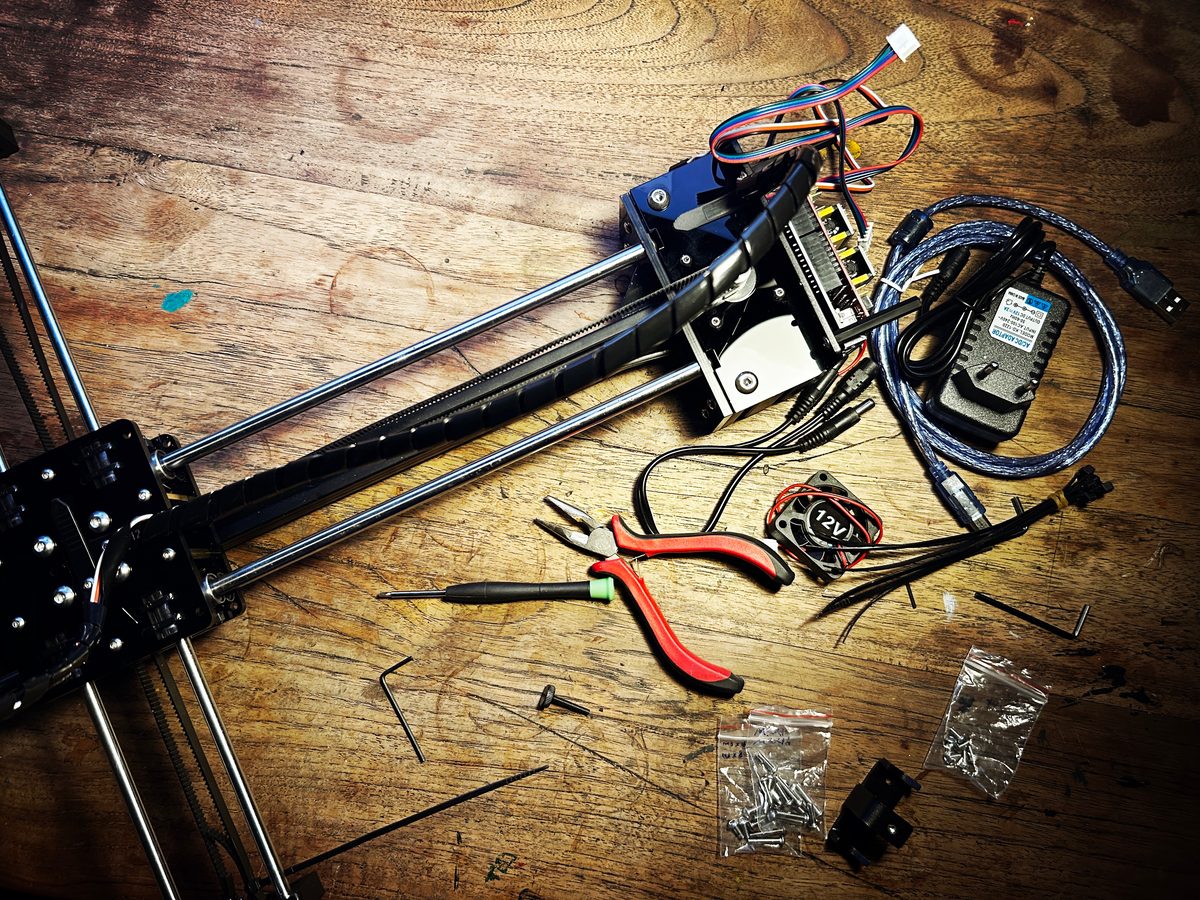
The plotter comes in parts: aluminum profiles and rods, acrylic plates, bearings, belts, the motors, the servo, the board and a bag of screws. The seller shares the assembly manual and software as one large zip file (about 380 MB) on Google Drive, with a PDF assembly manual, test instructions, example drawings and the software of the time.
Building it went fine. The manual is a little dated: the bundled programs are old versions (Inkscape 0.48 and 0.91, Universal Gcode Sender 1.0.9), and some photos do not match every part exactly. Use the manual for the mechanics and wiring, and current versions of the software, below.
The software
Four pieces, on the computer that is connected by USB:
| Piece | Does |
|---|---|
| USB driver (CH340/CH341) | Lets the computer talk to the board over a serial port. On Windows it usually has to be installed (the zip contains it); Linux has it built in. |
| Inkscape | The free drawing program in which you prepare the drawing: page size, paths, no fills. |
| LY Drawbot Tool by LOD | An Inkscape extension (for Inkscape 1.0 and later) that turns the paths of the drawing into G-code for this plotter, with the pen-up and pen-down commands and speeds. |
| Universal Gcode Sender (UGS) | Connects to the plotter, moves the pen by hand (jogging), sets the zero point, shows the drawing before it starts, and sends the G-code line by line. |
The extension is installed by unzipping its release into Inkscape's user extensions folder (Inkscape shows where under Edit › Preferences › System) and restarting Inkscape. Pick the release that matches your Inkscape version. Afterwards it appears under Extensions › Generate GCode for XY Plotter.
In UGS, choose the port of the board (on Windows
COM3 or similar, on Linux /dev/ttyUSB0),
the firmware GRBL and the speed 115200 baud, and connect. Before
anything else, test the pen in the console:
M3 S1000 should lower it and M5 raise it.
If it is the other way round, the servo is mounted or set reversed.
Preparing a first plot
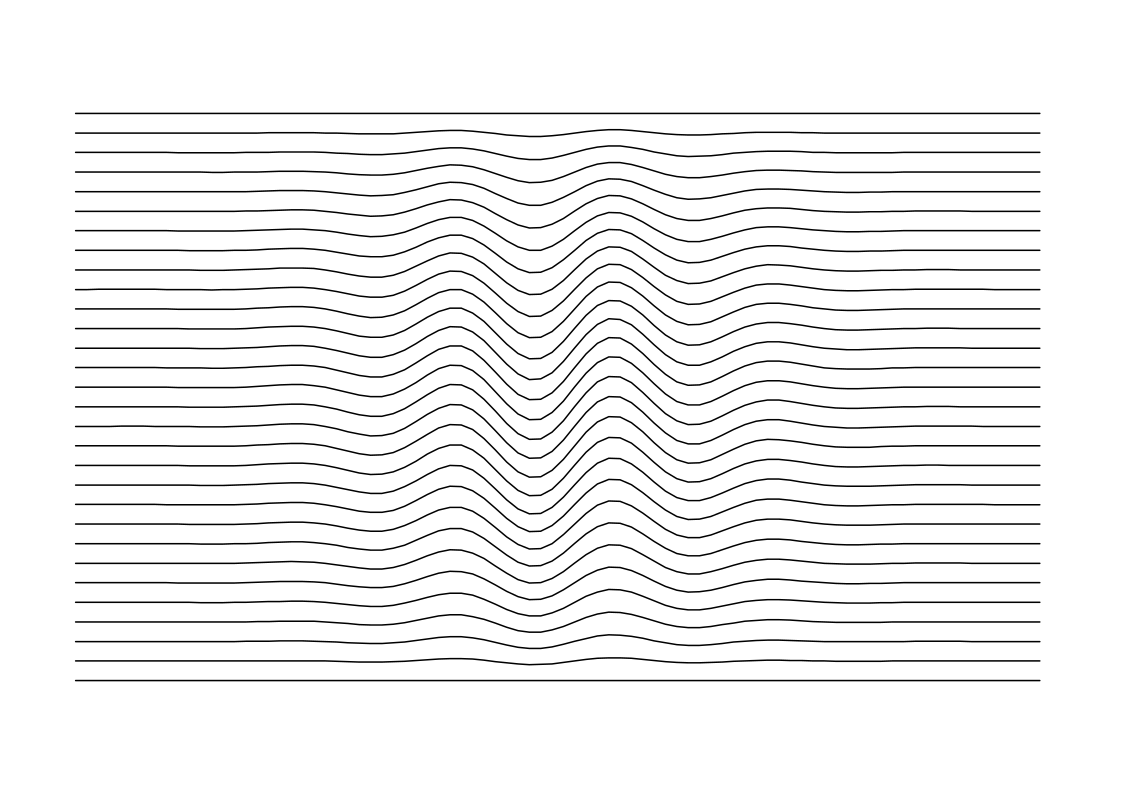
For a first plot, keep it simple: lines only. This drawing has thirty horizontal lines with a wave in the middle. It is A4 landscape in millimeters, consists of paths only, has no fills and no text, and every other line runs back the other way, so the pen hardly travels without drawing. It is about 8 meters of line, or around six minutes of plotting.
In Inkscape, step by step:
- Page: File › Document Properties: A4, landscape, display units and scale in millimeters, so that one user unit is one millimeter. The drawing above already is; your own drawings have to be (see the warning below).
-
Everything to paths: select all and use
Path › Object to Path (Shift+Ctrl+C). The extension only
reads
<path>elements: rectangles, circles, lines, polylines and text are skipped without a word unless you convert them first. On something that already is a path the command changes nothing, so doing it every time is a good habit. It does not help with a photo or other bitmap: that needs Path › Trace Bitmap to become lines. - No fills: a fill does not plot. Remove it, or you get only the outline anyway.
- Text: ordinary fonts become outlines, so each letter is drawn twice around. For pen-like text, use a single-line font, such as Inkscape's own Extensions › Text › Hershey Text.
- Inside the page: everything must stay inside the A4 area, with a margin. The plotter reaches 310 mm in X and 210 mm in Y — A4 landscape, a little wider — and on mine the soft limits in GRBL are off, so a drawing that is too large does not stop with an error: the carriage runs into the end of the frame.
-
Generate the G-code:
Extensions › Generate GCode for XY Plotter › XY Plotter tool
from Love Open Design. Set the unit to millimeters (the same as the document — the
extension warns that mixed units give strange results), choose the
output folder and a file name, and apply. The defaults (pen down
M3 S1000, pen upM5 S0, drawing speed 1500 mm/min) work as a start.
Paper and the zero point
The plotter has no sensors that tell it where it is. Whatever
position the pen is in when you set the zero point becomes
X0 Y0, the origin of its
coordinate frame, and every coordinate in the G-code is measured from there. The
extension measures from the bottom-left corner of the Inkscape page,
with Y going up, as G-code does. So:
- Fix the paper so it cannot shift: tape at the corners, or the clipboard the kit's photos show.
- In UGS, jog the pen (with the pen up) to the corner of the paper that matches the bottom-left of your Inkscape page. Small jog steps (1 mm, then 0.1 mm) help for the last bit.
- Set the zero point there: Reset Zero (or the zero button for X and Y) in UGS.
- Check the direction: jog 10 mm in X and in Y and see whether the pen moves along the paper the way the drawing will. If an axis runs the wrong way, the drawing will come out mirrored.
Plotting
Open the G-code file in UGS. The visualizer shows the drawing: check that it lies on the paper, starts where you expect, and stays within 310 by 210 mm. A long straight line from the zero point to the start of the drawing is normal: that is the pen traveling up, and it is not drawn. (The kit's own instructions use the older Grbl Controller, which has a visualizer too; either works.) Set the pen in its holder so that it just touches the paper in the down position, with a little spring left; too high gives gaps, too low drags and skips. Then press Send, and stay with the machine for the first plot, a hand near the power or the Stop button.
Easy to forget
- The USB driver, before UGS can find the port.
- Paper and page both A4 landscape, and the paper fixed in place.
- The zero point set at the right corner — again after moving the paper or switching the plotter off.
- Pen up before jogging, or the jog draws a line.
- The pen cap off. (Yes.)
- Cables with enough slack for the carriage to reach every corner.
- Plot time: a full page takes minutes to hours; a fineliner can dry out halfway through a long plot.
What I found
- Building it was fine, even though the manual is a little dated.
- A good plotter for beginners, and not expensive. I bought mine on Alibaba; other Chinese web shops sell it too.
- The quality is good enough, but certainly not professional.
- Above all: try things out. You learn by doing — a wrong corner, a pen too high or a drawing that runs off the page teaches more than the manual.
Next
Drawing in Inkscape is one way. The next note is about the other: generating the drawing with code, in Python — vsketch: Drawing for a Pen Plotter with Python.
Sources
- LY Drawbot assembly manual, drivers and examples (zip on Google Drive, shared by the seller)
- LY Drawbot Tool by LOD: the Inkscape extension
- Universal Gcode Sender
- Inkscape
- GRBL wiki: settings and commands